
Have you ever felt the need to revert to an older version of Android? Perhaps a new update introduced bugs, decreased performance, or removed features you relied on. Downgrading your Android version can be a solution, allowing you to return to a more stable and familiar operating system. This step-by-step tutorial will guide you through the process of downgrading your Android version, outlining the necessary precautions and providing clear instructions for a successful reversion. Understanding the risks and benefits associated with Android downgrading is crucial before proceeding. This guide covers everything you need to know to make an informed decision and execute the downgrade safely and effectively.
While downgrading Android can offer benefits like improved stability and regaining lost features, it’s essential to understand the potential risks. Downgrading your Android version can void your warranty, and the process itself carries the risk of data loss if not performed correctly. Therefore, backing up your data is strongly recommended before you begin. This tutorial will highlight the importance of data backup and provide guidance on how to create a comprehensive backup. By following this step-by-step tutorial and understanding the precautions involved, you can safely and efficiently downgrade your Android device to your preferred version.
Understanding the Risks and Benefits of Downgrading
Downgrading your Android version can be appealing for various reasons, but it’s crucial to weigh the potential benefits against the inherent risks before proceeding. Understanding these factors will help you make an informed decision.
Benefits
A primary benefit might be reverting to a more stable or familiar operating system if a newer update introduces bugs or performance issues. Downgrading could also restore compatibility with specific apps or hardware that are no longer supported by the latest Android version.
Risks
The most significant risk is the potential to “brick” your device, rendering it unusable. This can occur if the downgrading process is interrupted or if incompatible firmware is installed. Downgrading also voids your warranty in most cases. Data loss is another critical concern, as the process often requires a factory reset, wiping all data stored on your device.
Security vulnerabilities may also be introduced by reverting to an older Android version. Newer versions typically include security patches that address known exploits, leaving your device susceptible to threats if you downgrade.
Backing Up Your Data Before Downgrading
Before you begin the downgrading process, it’s crucial to back up your data. Downgrading often wipes your device clean, so creating a backup ensures you don’t lose important information.
There are several ways to back up your Android device:
- Cloud Backup: Most Android devices offer a built-in cloud backup service linked to your Google account. This typically backs up system settings, app data, and other information. Navigate to your device’s settings menu and locate the “Backup” or “System” section to configure this option.
- Computer Backup: You can connect your Android device to your computer and transfer important files manually. This is a reliable method for backing up photos, videos, music, and documents.
- Third-Party Apps: Numerous third-party apps are available on the Google Play Store specifically designed for backing up your data.
Choose the backup method that best suits your needs and ensure all your essential data is secured before proceeding.
Checking for Compatibility and Available Firmware
Before proceeding with the downgrade, it’s crucial to verify compatibility and the availability of the desired firmware version. Not all Android devices support downgrading, and even if they do, the specific version you want might not be readily available.
Device Compatibility: Research your specific device model online to determine if downgrading is officially supported or possible through community-developed methods. Check manufacturer forums or reputable Android communities for information related to your device.
Firmware Availability: Locate and download the appropriate firmware package for the target Android version. Ensure the firmware is designed specifically for your device model and variant. Using incorrect firmware can lead to irreversible damage. Reliable sources for firmware often include manufacturer websites or trusted community forums.
Firmware Integrity: After downloading, verify the integrity of the firmware file. This is typically done by checking the checksum or hash provided by the source against the downloaded file. This helps ensure the file hasn’t been corrupted during download.
Unlocking Your Bootloader (If Necessary)
Unlocking your bootloader is often a required step before downgrading your Android version. The bootloader is a program that loads the operating system when you power on your device. A locked bootloader often prevents installing unsigned or modified software, such as a downgraded Android version.
Important: Unlocking your bootloader will usually erase all data on your device. Ensure you have a complete backup before proceeding.
The process for unlocking the bootloader varies significantly between manufacturers and even between device models. Consult your device’s specific instructions from the manufacturer or reputable online communities dedicated to your device.
Generally, the process involves enabling developer options and USB debugging on your device, then using specific command-line tools on your computer to communicate with your device and unlock the bootloader. You’ll likely need specific drivers installed on your computer as well.
If your device doesn’t require an unlocked bootloader for downgrading, you can safely skip this step. Proceed with caution and research thoroughly before attempting to unlock your bootloader.
Using Flash Tools to Downgrade Your Android Version
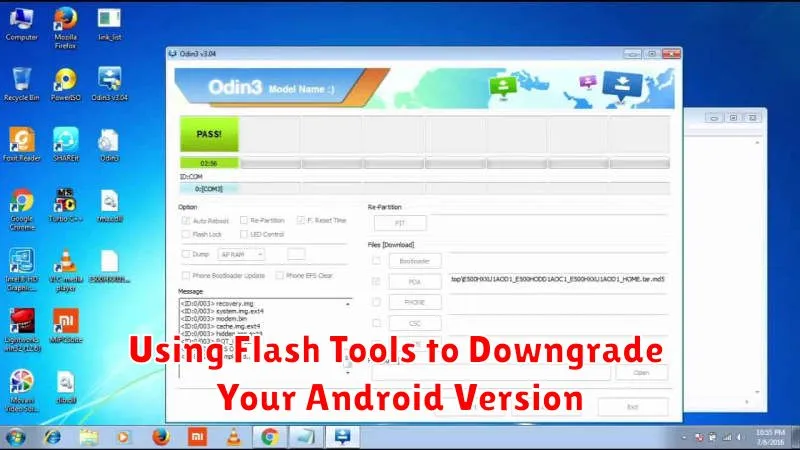
This stage involves using specific software to install the older Android version onto your device. Flash tools vary depending on the device manufacturer. Some popular tools include Odin for Samsung devices, fastboot for many Google and other Android devices, and SP Flash Tool for MediaTek devices. Ensure you download the correct tool for your specific phone model.
Once you have downloaded the appropriate flashing tool and the correct firmware file, you’ll need to put your device into a specific mode for flashing. This is usually Download Mode or Fastboot Mode. Consult your device’s documentation for the correct procedure to enter this mode.
Next, open the flash tool on your computer and connect your Android device. The tool should recognize your device. Carefully select the downloaded firmware file within the flash tool. Double-check to confirm it’s the intended version. Initiate the flashing process by clicking the designated button, often labeled “Start,” “Flash,” or similar.
Do not interrupt the flashing process. Disconnecting the device or powering off your computer could permanently damage your device. Once the process completes, the flash tool will usually display a success message. Your device will automatically reboot, and you should now be running the downgraded Android version.
Restoring Your Device to Factory Settings
After successfully downgrading your Android version, it’s crucial to perform a factory reset. This step helps eliminate any potential conflicts or leftover files from the previous Android version, ensuring a clean and stable system.
There are two primary methods to factory reset your device: through the settings menu or using recovery mode. The settings menu method is generally easier. Navigate to your device’s Settings, typically represented by a gear icon. Look for options like “System,” “Backup & reset,” or similar wording. Within this section, you should find the “Factory data reset” option. Carefully review the information presented, as this process will erase all data on your device.
Alternatively, if you are unable to access the settings menu, you can use recovery mode. The process for entering recovery mode varies depending on your device manufacturer, often involving a combination of button presses while powering on. Once in recovery mode, use the volume buttons to navigate and the power button to select. Look for the “Wipe data/factory reset” option. Confirm your choice, and the process will begin.
After the factory reset completes, your device will restart and guide you through the initial setup process as if it were new. You can then restore your previously backed-up data.
Troubleshooting Common Downgrading Issues
Downgrading your Android version can sometimes encounter issues. This section addresses common problems and their solutions.
Flash Tool Errors
Error messages within the flash tool often indicate specific problems. Consult the tool’s documentation or online forums for solutions related to the exact error code. Ensuring the correct firmware version for your device model is crucial.
Device Not Recognized by Computer
If your computer doesn’t recognize your device, try different USB ports and cables. Ensure the necessary drivers are installed on your computer. A reboot of both your device and computer might also resolve the issue.
Bootloop After Downgrade
A bootloop, where the device continuously restarts, can occur after downgrading. Try clearing the cache partition through the recovery mode. If the issue persists, a factory reset might be necessary, but remember this will erase all data.
Loss of Functionality
Certain features might not function correctly after downgrading. This can be due to hardware incompatibility with the older Android version. In such cases, returning to a newer version might be the only solution.
Re-Installing Your Apps and Data
After successfully downgrading your Android version and restoring your device, you’ll need to reinstall your apps and data. This process is relatively straightforward. Start by signing back into your Google account on your device. This will restore many of your settings and linked data.
Next, open the Google Play Store and begin reinstalling your essential applications. You can typically find previously installed apps in the “My apps & games” section of the Play Store. Be mindful that some apps may not be compatible with the older Android version you’ve downgraded to. Check for app updates frequently as developers often address compatibility issues.
If you previously backed up your app data using a third-party app or your device manufacturer’s tools, you can now restore that data. Refer to the specific backup solution’s instructions for the restoration process.
For data such as photos, videos, and music, if they were backed up to a cloud service or SD card, they can be restored from their respective locations. Remember that some apps store data locally on the device. If you didn’t specifically back up this data, it will be lost after a factory reset.
Tips for Maintaining Your Downgraded Android Version
After successfully downgrading, maintaining a stable and secure system is crucial. Regularly check for security updates for your specific downgraded version, as these may still be released occasionally, even for older builds. Be mindful that updates for newer Android versions will not be compatible.
Avoid automatic system updates. Your device might attempt to automatically update to the latest Android version, undoing your downgrade. Navigate to your system settings and disable automatic updates to prevent this.
Exercise caution when installing apps. Some apps designed for newer Android versions may not function correctly on your downgraded system. Check app compatibility before installation to avoid potential issues.
Periodically back up your data. This ensures you have a recovery point should any problems arise with your downgraded version. Utilize cloud-based backup services or local storage options.